QPR UI Windows Installer
Link to the installation package can be found from this wiki's main page.
If you are upgrading to the latest version of QPR UI, follow the upgrade instructions instead of this page instructions.
Before running installation wizard
Before running the installation wizard, check the following things:
System Requirements
Check that the QPR UI System Requirements are fulfilled.
QPR Suite Web Services Accessibility
Depending on which QPR Suite product you want to use as the data source for QPR UI, check that either:
- The QPR MEA Web Services you need is available by using the QPR Web Services Servicetester.
- The QPR ProcessAnalyzer web service is available by logging in to QPR ProcessAnalyzer with the Excel client.
Ports
Check whether there are other (server) applications listening on ports 4848, 8080 and 8181. QPR UI uses these ports by default because they are default ports for the GlassFish web server. Ports 8080 (http) and 8181 (https) can be changed in the QPR UI installation wizard, but port 4848 (GlassFish Admin Console) cannot be changed. QPR UI installation fails, if you try to use ports that are used by other applications during the installation.
It's possible to change the port 4848 in the GlassFish Admin Console, but it is doable only after the installation. This issue can be worked around by shutting down the other application during QPR UI installation as follows:
- Shutdown the other application using port 4848.
- Run QPR UI installation wizard as described in Running installation wizard.
- Change the GlassFish port from GlassFish Administration Console.
- Start the other application.
Running installation wizard
To install QPR UI, follow the instructions below:
| 1. Welcome Page | |
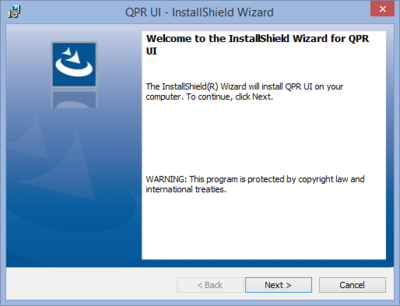
| This is the starting point of the QPR UI installation wizard.
Click Next to continue. |
|
| 2. License Agreement | |
| Here you can see the End User Software License terms for the software that is about to be installed. You will need to accept these terms before continuing the installation. Select I accept the terms in the license agreement and click Next to continue in the case you accept the license terms. Otherwise you'll need to cancel the installation. | 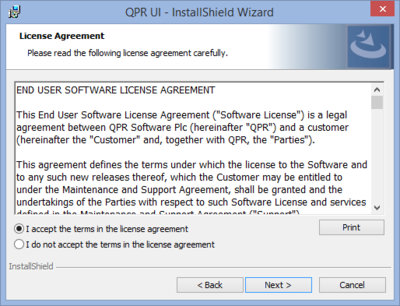
|
| 3. Destination Folder | |
| In this page you can see the folder where QPR UI is will be installed. If you want to install to a different folder, click on the Change button and define a new target folder. | 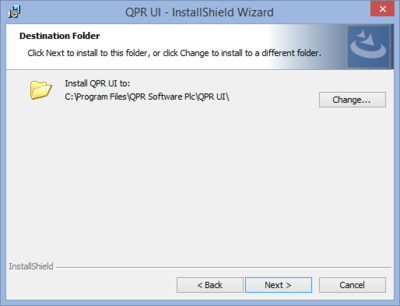
|
| 4. Database Configuration | |
Select whether to create a new database for QPR UI or to use an existing database.
|
400px |
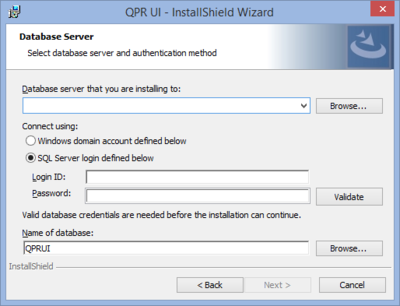
| 5. Database Server | |
| In this page you need to supply the information to connect to Microsoft SQL Server where the QPR UI database is located. The Database server drop-down list contains found SQL Servers, but if the desired SQL Server is not found, input the host name and the possible instance name in the form SQLSERVERNAME\INSTANCENAME. By default, the SQL Server port that is used is 1433, but the port can be defined in the form SQLSERVERNAME:PORTNUMBER. When using a named instance, the separate port definition should not be used. For connecting to the SQL Server, you can use either:
After inputting Login ID (username) and password, click on Validate to verify that the account can be used for connecting to the defined database server. The Next button is enabled only after a successful validation of credentials. The validation only checks that the account can be used to login to the SQL Server - it doesn't check that the account has enough rights to operate the database. Note for Windows authentication:
Name of database field defines QPR UI database name (that must already exist). |
|
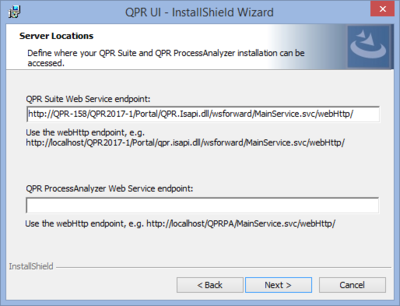
| 6. Server Locations | |
| Define where the QPR Suite and QPR ProcessAnalyzer Web Services can be accessed. For QPR Suite Web Service, the endpoint is given in the format: http://<your host>/<your IIS application>/Portal/QPR.Isapi.dll/wsforward/MainService.svc/webHttp/. The suggested url for QPR Suite Web Services points to QPR 2017.1 instance in the same server computer. localhost can be used if QPR Suite and QPR UI are on the same server computer. If you have QPR ProcessAnalyzer available, define its endpoint URL to the corresponding field. NOTE: If your QPR UI installation is running in a clustered environment, set UseXForwardedForAsClientIp to true in the web.config of the QPR ProcessAnalyzer instance that is used. Also note that when using SSL, both QPR Suite and QPR ProcessAnalyzer should be set to ignore client certificates in their IIS configuration. Click Next to continue. |
|
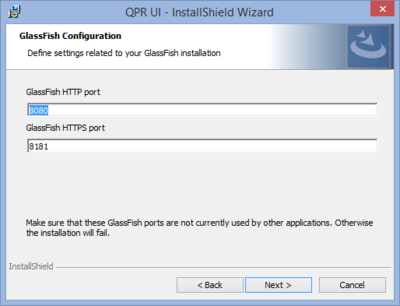
| 7. GlassFish Configuration | |
| Define the HTTP and HTTPS port numbers of the GlassFish application server used to host QPR UI.
netstat -an | find ":port_number_here" Click Next to continue. |
|
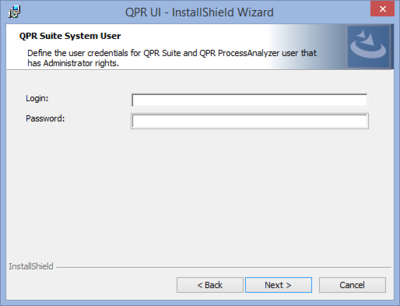
| 8. QPR Suite and QPR ProcessAnalyzer System User | |
| Here you need to define the user credentials of an administrator user that's found in QPR Suite and QPR ProcessAnalyzer services. The user account defined here is used to synchronize user information from QPR Suite and QPR ProcessAnalyzer to QPR UI.
Click Next to continue. |
|
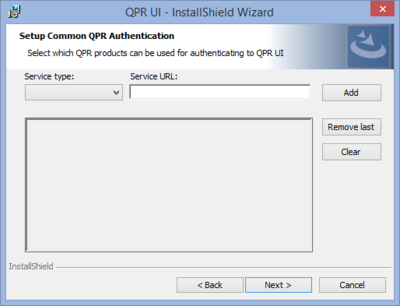
| 9. Common QPR Authentication Setup | |
| If you have other QPR Suite products in use, with these settings you can configure Common QPR Authentication to work between the products.
To add a URL:
If you need to change an existing definition, you can either remove the latest definition by clicking Remove last or remove all the definitions by clicking Clear, and then start adding again. Note that with the settings defined here, you can define the Common QPR Authentication to work when linking to QPR UI. If you need to link from QPR UI to some other QPR Suite product, you need to do define the settings in the other product. Click Next to continue. |
|
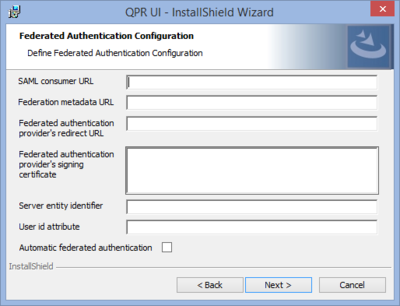
| 10. Federated Authentication Configuration | |
| This page allows configuring Single Sign-On (SSO) login that enables logging in to QPR UI using the existing credentials provided by your organization's federated identity provider. If there’s no applicable federated identity provider in your organization or you wish to configure it later, this page can be left blank. See the federated authentication page for more information how these settings are configured.
Click Next to continue. |
|
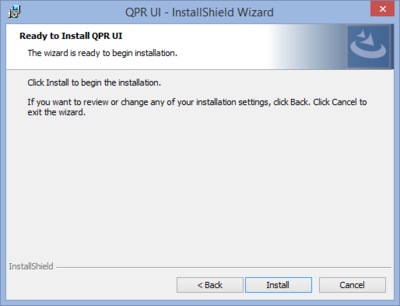
| 11. Ready to Install | |
| The installer is now ready to start. If you need to change any settings, click Back and make the necessary changes. Once you are satisfied with the settings, click Install to start the installation. |
|
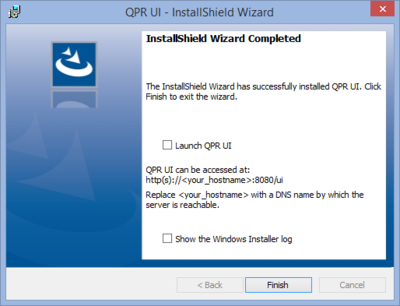
| 12. Complete | |
| The installation is now complete.
Check the Launch QPR UI checkbox to open the QPR UI login page. If you choose not to launch the login page straight away, you can access it later on at: http(s)://<your_server_dns_name>:8080/mobiledash. Click Finish to close the installer. |
|
Enabling SSL
See the instructions here for enabling SSL on QPR UI.
Maintenance
If you need to repair QPR UI installation for whatever reason, restart the "QPR UI" service after the repair before using the product.
Enabling More Descriptive Error Messages From QPR Suite Web Services
To enable more descriptive error messages in QPR UI when data from QPR Suite web services is queried, the default IIS setting for error code 500 in the QPR Suite web services needs to be changed.
To change the error setting:
- On the server machine running QPR Suite web services, go to Control Panel -> Administrative Tools -> Internet Information Services (IIS) Manager.
- Select the Server name > Sites > Default Web Site > <Your QPR installation application (e.g. QPR2017-1)> section.
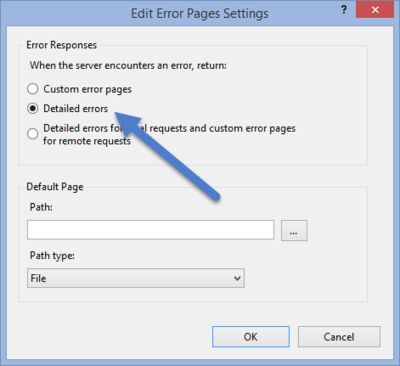
- Double-click Error Pages and Click Edit Feature Settings...
- Select Detailed errors and click OK:
